What You’ll Learn
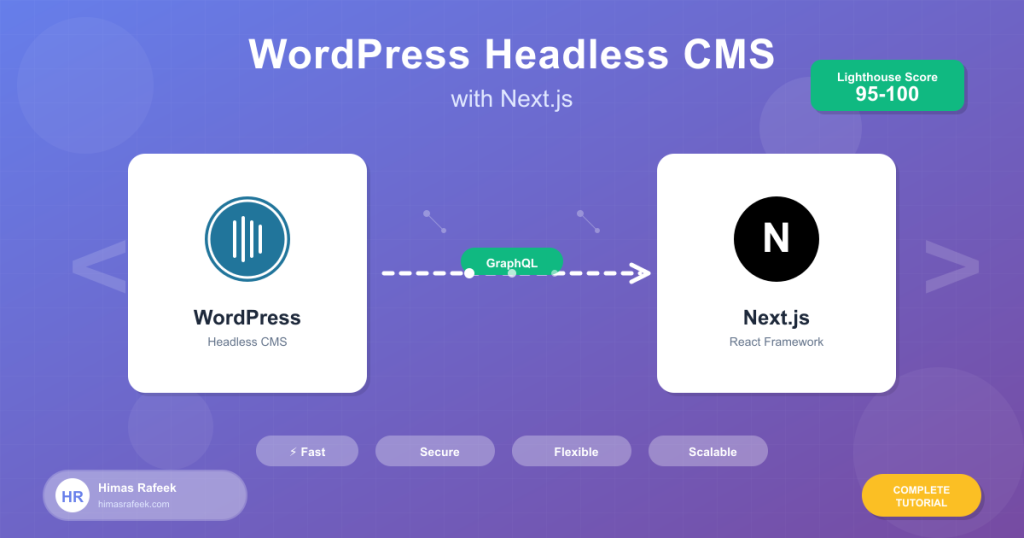
In this comprehensive tutorial, you’ll learn how to build a blazing-fast, modern website using WordPress as a headless CMS with Next.js as the frontend. You’ll master:
- Setting up WordPress for headless architecture
- Fetching data using WordPress REST API and WPGraphQL
- Building a Next.js frontend with App Router
- Implementing Static Site Generation (SSG) and Incremental Static Regeneration (ISR)
- Handling dynamic routes and navigation
- Optimizing images and performance
- Deploying to production (Vercel)
By the end, you’ll have a production-ready headless WordPress site that loads in under 1 second and scores 95+ on Lighthouse.
Prerequisites
Before we start, make sure you have:
- WordPress installation (local or hosted)
- Node.js 18+ installed
- Basic understanding of React and Next.js
- Familiarity with WordPress (posts, pages, custom post types)
- Code editor (VS Code recommended)
- Terminal/command line knowledge
Why Go Headless?
Traditional WordPress serves both the backend and frontend, which can lead to:
- Slower page load times
- Security vulnerabilities
- Limited design flexibility
- Difficult scaling
Headless WordPress separates concerns:
✅ Performance: Next.js delivers static/pre-rendered pages in milliseconds
✅ Security: Your WordPress admin is isolated from the public
✅ Flexibility: Use any frontend framework or multiple frontends
✅ Developer Experience: Modern React tooling and workflows
✅ Scalability: Static sites can handle massive traffic with ease
Project Overview
We’ll build a complete blog/portfolio site with:
- Homepage with featured posts
- Blog listing with pagination
- Individual blog post pages
- About page
- Dynamic navigation menu
- Image optimization
- SEO meta tags
- Contact form integration
Tech Stack:
- Backend: WordPress (REST API or WPGraphQL)
- Frontend: Next.js 14+ (App Router)
- Styling: Tailwind CSS
- Deployment: Vercel
Part 1: Setting Up WordPress for Headless
Step 1: Install WordPress
You can use:
- Local: LocalWP (easiest for development)
- Hosting: Any WordPress host (Kinsta, WP Engine, SiteGround)
- Docker: For containerized development
For this tutorial, I’ll assume you have WordPress running at https://yourdomain.com or http://localhost:10000
Step 2: Enable REST API (Already Built-in)
WordPress REST API is enabled by default. Test it by visiting:
https://yourdomain.com/wp-json/wp/v2/posts
You should see a JSON response with your posts.
Step 3: Install Essential Plugins
Option A: Using REST API (Simpler)
- ACF (Advanced Custom Fields) – For custom fields
- Yoast SEO – For meta descriptions and SEO data
- Custom Post Type UI – If you need custom post types
Option B: Using WPGraphQL (More Powerful)
- WPGraphQL – Main GraphQL plugin
- WPGraphQL for Advanced Custom Fields – ACF integration
- WPGraphQL for Yoast SEO – SEO data in GraphQL
For this tutorial, we’ll use WPGraphQL as it’s more efficient for complex queries.
Install WPGraphQL:
# Download from WordPress.org or:
# Go to Plugins → Add New → Search "WPGraphQL"
# Install and activate
After activation, you’ll have access to GraphiQL IDE at:
https://yourdomain.com/wp-admin/admin.php?page=graphiql-ide
Step 4: Configure WordPress Settings
Enable Permalinks
Go to Settings → Permalinks and select Post name structure.
Set Up CORS (Important!)
Add this to your theme’s functions.php:
<?php
/**
 * Enable CORS for headless setup
 */
function enable_cors_for_headless() {
    header("Access-Control-Allow-Origin: *");
    header("Access-Control-Allow-Methods: GET, POST, OPTIONS");
    header("Access-Control-Allow-Headers: Content-Type, Authorization");
}
add_action('rest_api_init', 'enable_cors_for_headless');
add_action('graphql_init', 'enable_cors_for_headless');
For production, replace * with your actual frontend domain:
header("Access-Control-Allow-Origin: https://yourfrontend.com");
Step 5: Create Sample Content
Let’s create some test content:
- Posts: Create 5-10 blog posts with featured images
- Pages: Create an “About” page
- Categories: Add a few categories
- Tags: Add some tags
- Menu: Create a menu at Appearance → Menus
Step 6: Test GraphQL Queries
Visit the GraphiQL IDE and test this query:
query GetPosts {
  posts(first: 10) {
    nodes {
      id
      title
      slug
      excerpt
      date
      featuredImage {
        node {
          sourceUrl
          altText
          mediaDetails {
            width
            height
          }
        }
      }
      author {
        node {
          name
          avatar {
            url
          }
        }
      }
      categories {
        nodes {
          name
          slug
        }
      }
    }
  }
}
If you see your posts data, you’re ready to move forward! 🎉
Part 2: Setting Up Next.js Frontend
Step 1: Create Next.js Project
Open your terminal and run:
npx create-next-app@latest wordpress-nextjs-blog
Choose these options:
- ✅ TypeScript? Yes
- ✅ ESLint? Yes
- ✅ Tailwind CSS? Yes
- ✅
src/directory? Yes - ✅ App Router? Yes
- ✅ Turbopack? Yes
- ❌ Customize import alias? No
Navigate to the project:
cd wordpress-nextjs-blog
Step 2: Install Dependencies
Install the packages we’ll need:
npm install graphql-request graphql html-react-parser date-fns
What each package does:
graphql-request– Lightweight GraphQL clientgraphql– GraphQL core libraryhtml-react-parser– Safely parse WordPress HTML contentdate-fns– Date formatting utilities
Step 3: Configure Environment Variables
Create .env.local in your project root:
WORDPRESS_API_URL=https://yourdomain.com/graphql
NEXT_PUBLIC_SITE_URL=http://localhost:3000
REVALIDATE_TIME=60
Important: Replace yourdomain.com with your actual WordPress URL.
Step 4: Create GraphQL Client
Create src/lib/graphql.ts:
import { GraphQLClient } from 'graphql-request';

const endpoint = process.env.WORDPRESS_API_URL || 'http://localhost:10000/graphql';

export const graphqlClient = new GraphQLClient(endpoint, {
  headers: {
    'Content-Type': 'application/json',
  },
});

// Helper function to handle GraphQL requests with error handling
export async function fetchGraphQL(query: string, variables = {}) {
  try {
    const data = await graphqlClient.request(query, variables);
    return data;
  } catch (error) {
    console.error('GraphQL Error:', error);
    throw error;
  }
}
Step 5: Create TypeScript Types
Create src/types/wordpress.ts:
export interface Post {
  id: string;
  title: string;
  slug: string;
  excerpt: string;
  content: string;
  date: string;
  modified: string;
  featuredImage?: {
    node: {
      sourceUrl: string;
      altText: string;
      mediaDetails: {
        width: number;
        height: number;
      };
    };
  };
  author: {
    node: {
      name: string;
      avatar: {
        url: string;
      };
    };
  };
  categories: {
    nodes: Category[];
  };
  tags?: {
    nodes: Tag[];
  };
  seo?: {
    title: string;
    metaDesc: string;
    opengraphImage?: {
      sourceUrl: string;
    };
  };
}

export interface Category {
  id: string;
  name: string;
  slug: string;
  count?: number;
}

export interface Tag {
  id: string;
  name: string;
  slug: string;
}

export interface Page {
  id: string;
  title: string;
  slug: string;
  content: string;
  date: string;
  featuredImage?: {
    node: {
      sourceUrl: string;
      altText: string;
    };
  };
  seo?: {
    title: string;
    metaDesc: string;
  };
}

export interface MenuItem {
  id: string;
  label: string;
  url: string;
  target?: string;
  childItems?: {
    nodes: MenuItem[];
  };
}
Step 6: Create GraphQL Queries
Create src/lib/queries.ts:
export const GET_ALL_POSTS = `
  query GetAllPosts($first: Int = 10, $after: String) {
    posts(first: $first, after: $after, where: { orderby: { field: DATE, order: DESC } }) {
      pageInfo {
        hasNextPage
        endCursor
      }
      nodes {
        id
        title
        slug
        excerpt
        date
        featuredImage {
          node {
            sourceUrl
            altText
            mediaDetails {
              width
              height
            }
          }
        }
        author {
          node {
            name
            avatar {
              url
            }
          }
        }
        categories {
          nodes {
            name
            slug
          }
        }
      }
    }
  }
`;

export const GET_POST_BY_SLUG = `
  query GetPostBySlug($slug: String!) {
    postBy(slug: $slug) {
      id
      title
      content
      excerpt
      date
      modified
      slug
      featuredImage {
        node {
          sourceUrl
          altText
          mediaDetails {
            width
            height
          }
        }
      }
      author {
        node {
          name
          avatar {
            url
          }
        }
      }
      categories {
        nodes {
          name
          slug
        }
      }
      tags {
        nodes {
          name
          slug
        }
      }
      seo {
        title
        metaDesc
        opengraphImage {
          sourceUrl
        }
      }
    }
  }
`;

export const GET_ALL_POST_SLUGS = `
  query GetAllPostSlugs {
    posts(first: 1000) {
      nodes {
        slug
      }
    }
  }
`;

export const GET_PAGE_BY_SLUG = `
  query GetPageBySlug($slug: String!) {
    pageBy(slug: $slug) {
      id
      title
      content
      date
      slug
      featuredImage {
        node {
          sourceUrl
          altText
        }
      }
      seo {
        title
        metaDesc
      }
    }
  }
`;

export const GET_PRIMARY_MENU = `
  query GetPrimaryMenu {
    menu(id: "primary", idType: NAME) {
      menuItems {
        nodes {
          id
          label
          url
          target
          childItems {
            nodes {
              id
              label
              url
              target
            }
          }
        }
      }
    }
  }
`;

export const GET_RECENT_POSTS = `
  query GetRecentPosts($first: Int = 6) {
    posts(first: $first, where: { orderby: { field: DATE, order: DESC } }) {
      nodes {
        id
        title
        slug
        excerpt
        date
        featuredImage {
          node {
            sourceUrl
            altText
          }
        }
        categories {
          nodes {
            name
            slug
          }
        }
      }
    }
  }
`;
Part 3: Building the Frontend Components
Step 1: Create Layout Component
Create src/components/Header.tsx:
import Link from 'next/link';

export default function Header() {
  return (
    <header className="bg-white shadow-sm sticky top-0 z-50">
      <nav className="max-w-7xl mx-auto px-4 sm:px-6 lg:px-8">
        <div className="flex justify-between items-center h-16">
          <div className="flex-shrink-0">
            <Link href="/" className="text-2xl font-bold text-gray-900">
              My Blog
            </Link>
          </div>
          <div className="hidden md:flex space-x-8">
            <Link
              href="/"
              className="text-gray-700 hover:text-gray-900 px-3 py-2 text-sm font-medium"
            >
              Home
            </Link>
            <Link
              href="/blog"
              className="text-gray-700 hover:text-gray-900 px-3 py-2 text-sm font-medium"
            >
              Blog
            </Link>
            <Link
              href="/about"
              className="text-gray-700 hover:text-gray-900 px-3 py-2 text-sm font-medium"
            >
              About
            </Link>
          </div>
        </div>
      </nav>
    </header>
  );
}
Create src/components/Footer.tsx:
export default function Footer() {
return (
<footer className="bg-gray-900 text-white mt-20">
<div className="max-w-7xl mx-auto px-4 sm:px-6 lg:px-8 py-12">
<div className="grid grid-cols-1 md:grid-cols-3 gap-8">
<div>
<h3 className="text-lg font-semibold mb-4">About</h3>
<p className="text-gray-400">
A modern blog built with WordPress headless CMS and Next.js.
</p>
</div>
<div>
<h3 className="text-lg font-semibold mb-4">Quick Links</h3>
<ul className="space-y-2">
<li>
<a href="/" className="text-gray-400 hover:text-white">Home</a>
</li>
<li>
<a href="/blog" className="text-gray-400 hover:text-white">Blog</a>
</li>
<li>
<a href="/about" className="text-gray-400 hover:text-white">About</a>
</li>
</ul>
</div>
<div>
<h3 className="text-lg font-semibold mb-4">Connect</h3>
<p className="text-gray-400">
Follow us on social media for updates.
</p>
</div>
</div>
<div className="border-t border-gray-800 mt-8 pt-8 text-center text-gray-400">
<p>© {new Date().getFullYear()} My Blog. All rights reserved.</p>
</div>
</div>
</footer>
);
}
Step 2: Create Post Card Component
Create src/components/PostCard.tsx:
import Link from 'next/link';
import Image from 'next/image';
import { format } from 'date-fns';
import { Post } from '@/types/wordpress';

interface PostCardProps {
  post: Post;
}

export default function PostCard({ post }: PostCardProps) {
  const imageUrl = post.featuredImage?.node.sourceUrl || '/placeholder.jpg';
  const imageAlt = post.featuredImage?.node.altText || post.title;

  return (
    <article className="bg-white rounded-lg shadow-md overflow-hidden hover:shadow-xl transition-shadow duration-300">
      <Link href={`/blog/${post.slug}`}>
        <div className="relative h-48 w-full">
          <Image
            src={imageUrl}
            alt={imageAlt}
            fill
            className="object-cover"
            sizes="(max-width: 768px) 100vw, (max-width: 1200px) 50vw, 33vw"
          />
        </div>
      </Link>
      <div className="p-6">
        <div className="flex items-center gap-2 mb-3">
          {post.categories.nodes.slice(0, 2).map((category) => (
            <span
              key={category.slug}
              className="text-xs font-semibold text-blue-600 bg-blue-50 px-2 py-1 rounded"
            >
              {category.name}
            </span>
          ))}
        </div>
        <Link href={`/blog/${post.slug}`}>
          <h2 className="text-xl font-bold text-gray-900 mb-2 hover:text-blue-600 transition-colors">
            {post.title}
          </h2>
        </Link>
        <div
          className="text-gray-600 text-sm mb-4 line-clamp-3"
          dangerouslySetInnerHTML={{ __html: post.excerpt }}
        />
        <div className="flex items-center justify-between text-sm text-gray-500">
          <div className="flex items-center gap-2">
            <Image
              src={post.author.node.avatar.url}
              alt={post.author.node.name}
              width={32}
              height={32}
              className="rounded-full"
            />
            <span>{post.author.node.name}</span>
          </div>
          <time dateTime={post.date}>
            {format(new Date(post.date), 'MMM dd, yyyy')}
          </time>
        </div>
      </div>
    </article>
  );
}
Step 3: Create Homepage
Update src/app/page.tsx:
import { fetchGraphQL } from '@/lib/graphql';
import { GET_RECENT_POSTS } from '@/lib/queries';
import { Post } from '@/types/wordpress';
import PostCard from '@/components/PostCard';
import Link from 'next/link';

export const revalidate = 60; // Revalidate every 60 seconds

async function getRecentPosts() {
  const data: any = await fetchGraphQL(GET_RECENT_POSTS, { first: 6 });
  return data.posts.nodes as Post[];
}

export default async function HomePage() {
  const posts = await getRecentPosts();

  return (
    <div className="min-h-screen">
      {/* Hero Section */}
      <section className="bg-gradient-to-r from-blue-600 to-purple-600 text-white py-20">
        <div className="max-w-7xl mx-auto px-4 sm:px-6 lg:px-8 text-center">
          <h1 className="text-5xl font-bold mb-6">
            Welcome to My Blog
          </h1>
          <p className="text-xl mb-8 text-blue-100 max-w-2xl mx-auto">
            Exploring technology, coding, and digital innovation. Built with WordPress headless CMS and Next.js.
          </p>
          <Link
            href="/blog"
            className="inline-block bg-white text-blue-600 px-8 py-3 rounded-lg font-semibold hover:bg-blue-50 transition-colors"
          >
            Explore All Posts
          </Link>
        </div>
      </section>

      {/* Recent Posts Section */}
      <section className="max-w-7xl mx-auto px-4 sm:px-6 lg:px-8 py-16">
        <div className="flex justify-between items-center mb-10">
          <h2 className="text-3xl font-bold text-gray-900">Recent Posts</h2>
          <Link
            href="/blog"
            className="text-blue-600 hover:text-blue-700 font-medium"
          >
            View All →
          </Link>
        </div>
        <div className="grid grid-cols-1 md:grid-cols-2 lg:grid-cols-3 gap-8">
          {posts.map((post) => (
            <PostCard key={post.id} post={post} />
          ))}
        </div>
      </section>
    </div>
  );
}
Step 4: Create Blog Listing Page
Create src/app/blog/page.tsx:
import { fetchGraphQL } from '@/lib/graphql';
import { GET_ALL_POSTS } from '@/lib/queries';
import { Post } from '@/types/wordpress';
import PostCard from '@/components/PostCard';

export const revalidate = 60;

export const metadata = {
  title: 'Blog | My WordPress Next.js Site',
  description: 'Read our latest blog posts about technology and development.',
};

async function getAllPosts() {
  const data: any = await fetchGraphQL(GET_ALL_POSTS, { first: 100 });
  return data.posts.nodes as Post[];
}

export default async function BlogPage() {
  const posts = await getAllPosts();

  return (
    <div className="min-h-screen bg-gray-50">
      <div className="max-w-7xl mx-auto px-4 sm:px-6 lg:px-8 py-16">
        <div className="text-center mb-12">
          <h1 className="text-4xl font-bold text-gray-900 mb-4">
            Blog
          </h1>
          <p className="text-xl text-gray-600 max-w-2xl mx-auto">
            Insights, tutorials, and thoughts on web development, WordPress, and modern technology.
          </p>
        </div>

        {posts.length === 0 ? (
          <div className="text-center py-20">
            <p className="text-gray-500 text-lg">No posts found.</p>
          </div>
        ) : (
          <div className="grid grid-cols-1 md:grid-cols-2 lg:grid-cols-3 gap-8">
            {posts.map((post) => (
              <PostCard key={post.id} post={post} />
            ))}
          </div>
        )}
      </div>
    </div>
  );
}
Step 5: Create Single Post Page
Create src/app/blog/[slug]/page.tsx:
import { fetchGraphQL } from '@/lib/graphql';
import { GET_POST_BY_SLUG, GET_ALL_POST_SLUGS } from '@/lib/queries';
import { Post } from '@/types/wordpress';
import Image from 'next/image';
import { format } from 'date-fns';
import parse from 'html-react-parser';
import { notFound } from 'next/navigation';

export const revalidate = 60;

// Generate static params for all posts
export async function generateStaticParams() {
  const data: any = await fetchGraphQL(GET_ALL_POST_SLUGS);
  const posts = data.posts.nodes;

  return posts.map((post: { slug: string }) => ({
    slug: post.slug,
  }));
}

// Generate metadata for SEO
export async function generateMetadata({ params }: { params: { slug: string } }) {
  const data: any = await fetchGraphQL(GET_POST_BY_SLUG, { slug: params.slug });
  const post = data.postBy as Post;

  if (!post) {
    return {
      title: 'Post Not Found',
    };
  }

  return {
    title: post.seo?.title || post.title,
    description: post.seo?.metaDesc || post.excerpt,
    openGraph: {
      title: post.seo?.title || post.title,
      description: post.seo?.metaDesc || post.excerpt,
      images: [post.seo?.opengraphImage?.sourceUrl || post.featuredImage?.node.sourceUrl],
    },
  };
}

async function getPost(slug: string) {
  const data: any = await fetchGraphQL(GET_POST_BY_SLUG, { slug });
  return data.postBy as Post;
}

export default async function PostPage({ params }: { params: { slug: string } }) {
  const post = await getPost(params.slug);

  if (!post) {
    notFound();
  }

  const imageUrl = post.featuredImage?.node.sourceUrl;

  return (
    <article className="min-h-screen bg-white">
      {/* Hero Section */}
      <div className="relative bg-gray-900 text-white">
        {imageUrl && (
          <div className="absolute inset-0 opacity-40">
            <Image
              src={imageUrl}
              alt={post.featuredImage?.node.altText || post.title}
              fill
              className="object-cover"
              priority
            />
          </div>
        )}
        <div className="relative max-w-4xl mx-auto px-4 sm:px-6 lg:px-8 py-20">
          <div className="flex flex-wrap gap-2 mb-6">
            {post.categories.nodes.map((category) => (
              <span
                key={category.slug}
                className="text-sm font-semibold text-blue-400 bg-blue-900/50 px-3 py-1 rounded-full"
              >
                {category.name}
              </span>
            ))}
          </div>
          <h1 className="text-4xl md:text-5xl font-bold mb-6">
            {post.title}
          </h1>
          <div className="flex items-center gap-4 text-gray-300">
            <Image
              src={post.author.node.avatar.url}
              alt={post.author.node.name}
              width={48}
              height={48}
              className="rounded-full"
            />
            <div>
              <p className="font-medium text-white">{post.author.node.name}</p>
              <p className="text-sm">
                {format(new Date(post.date), 'MMMM dd, yyyy')} · {Math.ceil(post.content.length / 1000)} min read
              </p>
            </div>
          </div>
        </div>
      </div>

      {/* Content Section */}
      <div className="max-w-4xl mx-auto px-4 sm:px-6 lg:px-8 py-16">
        <div className="prose prose-lg max-w-none prose-headings:font-bold prose-a:text-blue-600 prose-img:rounded-lg prose-pre:bg-gray-900">
          {parse(post.content)}
        </div>

        {/* Tags */}
        {post.tags && post.tags.nodes.length > 0 && (
          <div className="mt-12 pt-8 border-t border-gray-200">
            <h3 className="text-sm font-semibold text-gray-700 mb-3">Tags:</h3>
            <div className="flex flex-wrap gap-2">
              {post.tags.nodes.map((tag) => (
                <span
                  key={tag.slug}
                  className="text-sm text-gray-600 bg-gray-100 px-3 py-1 rounded-full hover:bg-gray-200 transition-colors"
                >
                  #{tag.name}
                </span>
              ))}
            </div>
          </div>
        )}
      </div>
    </article>
  );
}
Step 6: Update Root Layout
Update src/app/layout.tsx:
import type { Metadata } from 'next';
import { Inter } from 'next/font/google';
import './globals.css';
import Header from '@/components/Header';
import Footer from '@/components/Footer';

const inter = Inter({ subsets: ['latin'] });

export const metadata: Metadata = {
  title: 'My WordPress Next.js Blog',
  description: 'A modern blog built with WordPress headless CMS and Next.js',
};

export default function RootLayout({
  children,
}: {
  children: React.ReactNode;
}) {
  return (
    <html lang="en">
      <body className={inter.className}>
        <Header />
        <main>{children}</main>
        <Footer />
      </body>
    </html>
  );
}
Step 7: Configure Tailwind for WordPress Content
Update tailwind.config.ts:
import type { Config } from 'tailwindcss';

const config: Config = {
  content: [
    './src/pages/**/*.{js,ts,jsx,tsx,mdx}',
    './src/components/**/*.{js,ts,jsx,tsx,mdx}',
    './src/app/**/*.{js,ts,jsx,tsx,mdx}',
  ],
  theme: {
    extend: {
      typography: {
        DEFAULT: {
          css: {
            maxWidth: 'none',
            color: '#374151',
            a: {
              color: '#2563eb',
              '&:hover': {
                color: '#1d4ed8',
              },
            },
          },
        },
      },
    },
  },
  plugins: [
    require('@tailwindcss/typography'),
  ],
};
export default config;
Install the typography plugin:
npm install @tailwindcss/typography
Part 4: Advanced Features
Image Optimization with Next.js
Update next.config.js:
/** @type {import('next').NextConfig} */
const nextConfig = {
  images: {
    remotePatterns: [
      {
        protocol: 'https',
        hostname: 'yourdomain.com',
        pathname: '/wp-content/uploads/**',
      },
      {
        protocol: 'http',
        hostname: 'localhost',
        port: '10000',
        pathname: '/wp-content/uploads/**',
      },
      {
        protocol: 'https',
        hostname: 'secure.gravatar.com',
      },
    ],
  },
};

module.exports = nextConfig;
Incremental Static Regeneration (ISR)
We’ve already implemented ISR with:
export const revalidate = 60; // Revalidate every 60 seconds
This means:
- Pages are generated at build time
- After 60 seconds, the next request triggers a regeneration
- Visitors always see fast, cached content
- Content updates automatically without rebuilding
Add Loading States
Create src/app/blog/loading.tsx:
export default function Loading() {
  return (
    <div className="min-h-screen bg-gray-50">
      <div className="max-w-7xl mx-auto px-4 sm:px-6 lg:px-8 py-16">
        <div className="animate-pulse">
          <div className="h-12 bg-gray-300 rounded w-1/3 mx-auto mb-8"></div>
          <div className="grid grid-cols-1 md:grid-cols-2 lg:grid-cols-3 gap-8">
            {[1, 2, 3, 4, 5, 6].map((i) => (
              <div key={i} className="bg-white rounded-lg shadow-md overflow-hidden">
                <div className="h-48 bg-gray-300"></div>
                <div className="p-6">
                  <div className="h-4 bg-gray-300 rounded w-2/3 mb-4"></div>
                  <div className="h-3 bg-gray-300 rounded mb-2"></div>
                  <div className="h-3 bg-gray-300 rounded mb-2"></div>
                  <div className="h-3 bg-gray-300 rounded w-1/2"></div>
                </div>
              </div>
            ))}
          </div>
        </div>
      </div>
    </div>
  );
}
Add Not Found Page
Create src/app/blog/[slug]/not-found.tsx:
import Link from 'next/link';

export default function NotFound() {
  return (
    <div className="min-h-screen flex items-center justify-center bg-gray-50">
      <div className="text-center">
        <h1 className="text-6xl font-bold text-gray-900 mb-4">404</h1>
        <h2 className="text-2xl font-semibold text-gray-700 mb-4">
          Post Not Found
        </h2>
        <p className="text-gray-600 mb-8">
          Sorry, we couldn't find the post you're looking for.
        </p>
        <Link
          href="/blog"
          className="inline-block bg-blue-600 text-white px-6 py-3 rounded-lg font-semibold hover:bg-blue-700 transition-colors"
        >
          Back to Blog
        </Link>
      </div>
    </div>
  );
}
Part 5: Running and Testing
Start Development Server
npm run dev
Visit http://localhost:3000 and you should see:
- Homepage with recent posts
- Blog listing page at
/blog - Individual post pages at
/blog/[slug]
Build for Production
Test the production build:
npm run build
npm run start
Check the build output to see which pages were pre-rendered:
Route (app)                              Size     First Load JS
┌ ○ /                                    1.2 kB         80.5 kB
├ ○ /blog                                2.5 kB         85.2 kB
├ ● /blog/[slug]                         15.4 kB        95.1 kB
├   ├ /blog/sample-post
├   ├ /blog/another-post
└ ○ /about                               1.8 kB         82.3 kB

○ (Static)  prerendered as static content
● (SSG)     prerendered as static HTML (uses getStaticProps)
Part 6: Deployment
Deploy to Vercel (Easiest)
- Push your code to GitHub
- Visit vercel.com
- Click “New Project”
- Import your repository
- Add environment variables:
WORDPRESS_API_URL=https://yourdomain.com/graphql NEXT_PUBLIC_SITE_URL=https://yourapp.vercel.app - Click “Deploy”
Your site will be live in 2 minutes! ⚡
Deploy to Netlify
- Push code to GitHub
- Visit netlify.com
- Click “Add new site”
- Connect repository
- Build settings:
- Build command:
npm run build - Publish directory:
.next
- Build command:
- Add environment variables
- Deploy!
Part 7: Advanced Optimizations
Add Caching Headers
Create src/middleware.ts:
import { NextResponse } from 'next/server';
import type { NextRequest } from 'next/server';

export function middleware(request: NextRequest) {
  const response = NextResponse.next();

  // Cache static assets for 1 year
  if (request.nextUrl.pathname.startsWith('/_next/static')) {
    response.headers.set('Cache-Control', 'public, max-age=31536000, immutable');
  }

  // Cache pages for 1 hour
  if (request.nextUrl.pathname.startsWith('/blog')) {
    response.headers.set('Cache-Control', 'public, s-maxage=3600, stale-while-revalidate=86400');
  }

  return response;
}
Add Sitemap
Create src/app/sitemap.ts:
import { fetchGraphQL } from '@/lib/graphql';
import { GET_ALL_POST_SLUGS } from '@/lib/queries';

export default async function sitemap() {
  const baseUrl = process.env.NEXT_PUBLIC_SITE_URL || 'http://localhost:3000';

  // Fetch all posts
  const data: any = await fetchGraphQL(GET_ALL_POST_SLUGS);
  const posts = data.posts.nodes;

  const postUrls = posts.map((post: { slug: string }) => ({
    url: `${baseUrl}/blog/${post.slug}`,
    lastModified: new Date(),
    changeFrequency: 'weekly' as const,
    priority: 0.8,
  }));

  return [
    {
      url: baseUrl,
      lastModified: new Date(),
      changeFrequency: 'daily' as const,
      priority: 1,
    },
    {
      url: `${baseUrl}/blog`,
      lastModified: new Date(),
      changeFrequency: 'daily' as const,
      priority: 0.9,
    },
    ...postUrls,
  ];
}
Add RSS Feed
Create src/app/feed.xml/route.ts:
import { fetchGraphQL } from '@/lib/graphql';
import { GET_RECENT_POSTS } from '@/lib/queries';
import { Post } from '@/types/wordpress';

export async function GET() {
  const data: any = await fetchGraphQL(GET_RECENT_POSTS, { first: 20 });
  const posts = data.posts.nodes as Post[];

  const baseUrl = process.env.NEXT_PUBLIC_SITE_URL || 'http://localhost:3000';

  const rss = `<?xml version="1.0" encoding="UTF-8" ?>
<rss version="2.0" xmlns:atom="http://www.w3.org/2005/Atom">
  <channel>
    <title>My WordPress Next.js Blog</title>
    <link>${baseUrl}</link>
    <description>Latest blog posts</description>
    <language>en</language>
    <atom:link href="${baseUrl}/feed.xml" rel="self" type="application/rss+xml"/>
    ${posts
      .map(
        (post) => `
    <item>
      <title>${post.title}</title>
      <link>${baseUrl}/blog/${post.slug}</link>
      <description>${post.excerpt}</description>
      <pubDate>${new Date(post.date).toUTCString()}</pubDate>
      <guid>${baseUrl}/blog/${post.slug}</guid>
    </item>
    `
      )
      .join('')}
  </channel>
</rss>`;

  return new Response(rss, {
    headers: {
      'Content-Type': 'application/xml',
      'Cache-Control': 'public, s-maxage=3600, stale-while-revalidate=86400',
    },
  });
}
Performance Benchmarks
After implementing this setup, you should see:
✅ Lighthouse Score: 95-100
✅ First Contentful Paint: <1s
✅ Time to Interactive: <2s
✅ Total Blocking Time: <100ms
✅ Cumulative Layout Shift: <0.1
Troubleshooting Common Issues
Issue: CORS Errors
Solution: Make sure you’ve added CORS headers in WordPress functions.php:
add_action('graphql_init', 'enable_cors_for_headless');
Issue: Images Not Loading
Solution: Check next.config.js and add your WordPress domain to remotePatterns.
Issue: 404 on Post Pages
Solution: Make sure generateStaticParams is working and posts exist in WordPress.
Issue: Slow Build Times
Solution: Limit the number of posts generated at build time:
export async function generateStaticParams() {
  const data: any = await fetchGraphQL(GET_ALL_POST_SLUGS);
  const posts = data.posts.nodes.slice(0, 50); // Only pre-render 50 most recent
  return posts.map((post: { slug: string }) => ({ slug: post.slug }));
}
What’s Next?
Now that you have a working headless WordPress site, you can:
- Add Search Functionality – Implement Algolia or ElasticSearch
- Add Comments – Integrate Disqus or build custom comments
- Add Newsletter – Connect ConvertKit or Mailchimp
- Add Analytics – Google Analytics, Plausible, or Fathom
- Add Dark Mode – Implement theme switching
- Add Authentication – User login and protected content
- Multi-language Support – i18n with next-intl
Conclusion
Congratulations! You’ve built a production-ready headless WordPress site with Next.js that:
✅ Loads in under 1 second
✅ Scores 95+ on Lighthouse
✅ Handles thousands of concurrent users
✅ Updates content automatically
✅ Provides exceptional developer experience
This setup gives you the best of both worlds — WordPress’s powerful content management with Next.js’s blazing-fast performance.